
If you can’t see the WiFi option in Windows 11, it could be due to a variety of reasons, such as a temporary error, misconfiguration, or hardware failure. But don’t worry, we show you some methods that can solve this problem and recover your connection.
There is no doubt that laptops are an essential part of work or school, and in most cases, their functionality depends largely on a stable WiFi connection.
However, it can be frustrating when your Windows 11 device doesn’t show any available network options.
There are several causes that can cause this problem, such as a temporary failure, incorrect configuration, or a hardware problem.
But don’t worry, in this article we are going to find a solution to this problem. It is for this reason that we share with you 9 effective ways to make the WiFi option appear again on your laptop:
Restart Windows and your WiFi router
The first solution is always the simplest, and in this case it is no exception. Restarting your computer and WiFi router can solve many problems, including this one.
To do this, simply right-click the Start button, then find and select the Shutdown button, and finally Restart.
On the other hand, to restart your router, find the power button on the back or side, press and hold for about 10 seconds until the device turns off. Now, wait about 30 seconds before turning it back on.
After restarting both devices, check if you can now see the available WiFi networks on your Windows 11 laptop or PC.
Forget and reconnect to the network
If you’re having trouble connecting to a specific WiFi network that previously worked, forgetting and reconnecting to that network can be quite helpful.
This may also remove any known networks with a different name. Follow these steps:
- Open Settings using the Windows + I key combination.
- Click Network and Internet.
- Select WiFi.
- Scroll down and select Manage known networks.
- Review the list and click Forget against the relevant networks.
- When you have forgotten the network, you can reconnect.
Check if your WiFi adapter is enabled
Another possible problem is that your laptop’s WiFi adapter is not enabled to detect available networks. To check this, go to the Start menu and type Control Panel, then open it from the search results.
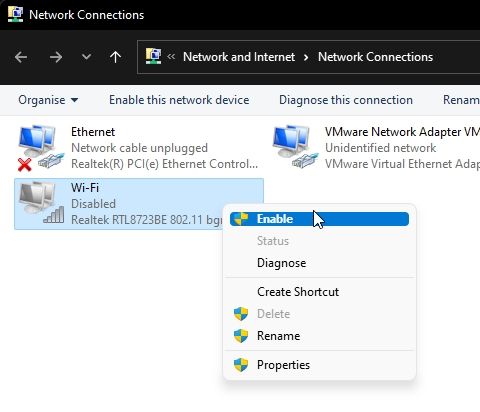
In the new window click on Network and Sharing Center, and in the side menu options select Change adapter settings. At this point right click on your WiFi adapter and, if available, select Enable.
Run the network troubleshooter
It is important to mention that Windows includes a troubleshooting tool that can basically help diagnose and fix network problems.

To run this function, follow these steps:
- Open Settings with Windows + I.
- From the side menu, select System.
- Click Troubleshoot and choose Other Troubleshooters.
- Within the Network and Internet section, select Run.
- The tool will scan your device for possible errors and offer suggestions to fix them.
Update drivers
Your computer drivers are the programs that allow your hardware to function correctly. If your WiFi adapter drivers are outdated, it can cause connection problems.
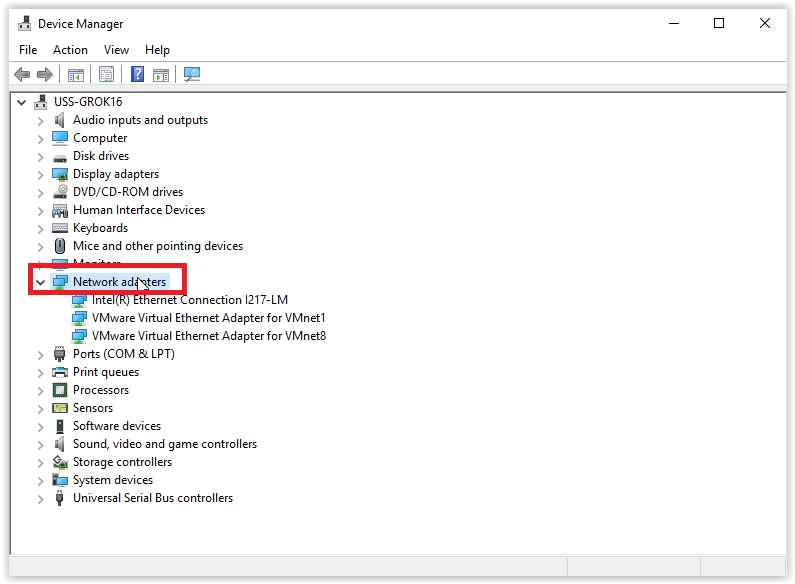
To check for updates, right-click the Windows 11 Start menu and select Device Manager. Expand the Network Adapters section and right-click on your WiFi driver, at this point you should select Update driver and choose Search for drivers automatically.
Reset the network
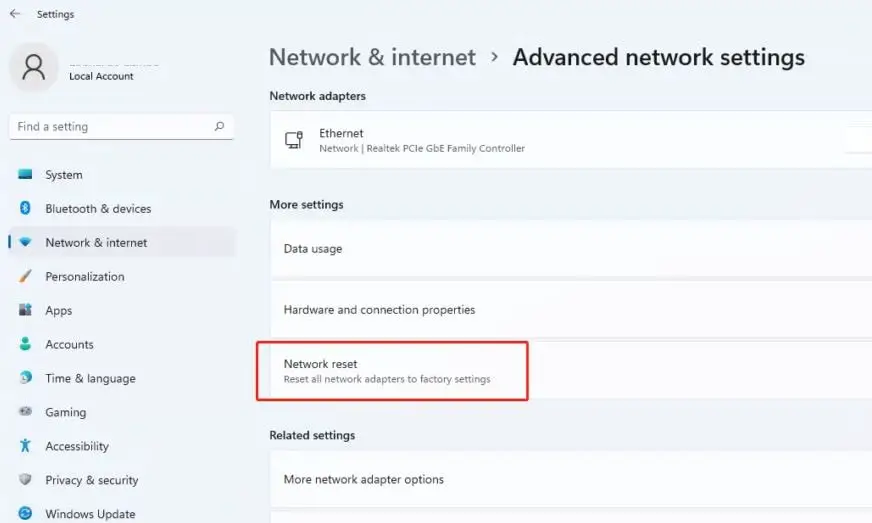
When connectivity issues persist, performing a network reset on your PC or laptop can be an effective measure.
This will remove all network-related components, including network adapters, drivers, and settings, and then reinstall a default configuration.
To perform this procedure;
- press Windows + I keys to open Settings.
- Select Network & Internet and Advanced network settings.
- Inside the More settings section, click on Network reset and Reset now.
The last step is to restart your laptop for the changes to take effect. Turn on your device and check if the wireless network options are visible.
Set services to automatic
Ensuring that network-related services start automatically on your device is essential to ensure smooth operation.
It should be noted that if they are not configured correctly, connectivity problems may arise. To fix this, follow these steps:
- In the Start menu, type and select Services.
- Scroll down and double-click on WLAN AutoConfig and in the Properties window, select the Startup Type drop-down menu.
- Choose Automatic and Apply and Accept.
Reset TCP/IP and clear DNS cache
TCP/IP is essential for your laptop’s communication with other devices on the Internet. Resetting it to its default settings may help resolve connection issues.
To do this you must right click on the Start menu and open Command Prompt as administrator. In the window type the following command and press Enter :
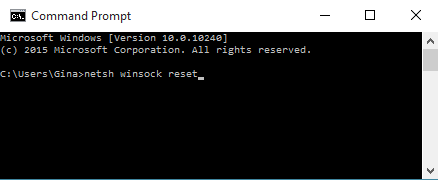
netsh winsock resetThen, repeat the same process with this command:

netsh int ip resetOnce you have run both commands, close the Command Prompt window and restart your computer. By doing this procedure you will be taking the opportunity to eliminate the DNS cache on your system.
Check for Windows updates
Finally, it is essential to ensure that your operating system is updated to the latest version. Updates may contain bug fixes as well as improvements that address connectivity issues.
Checking if you have the latest version of Windows is basically an easy task. In the Start menu type Windows Update and click Check for updates. When the system installs the update, you must restart your computer and check if the WiFi option in Windows 11 is now visible.

