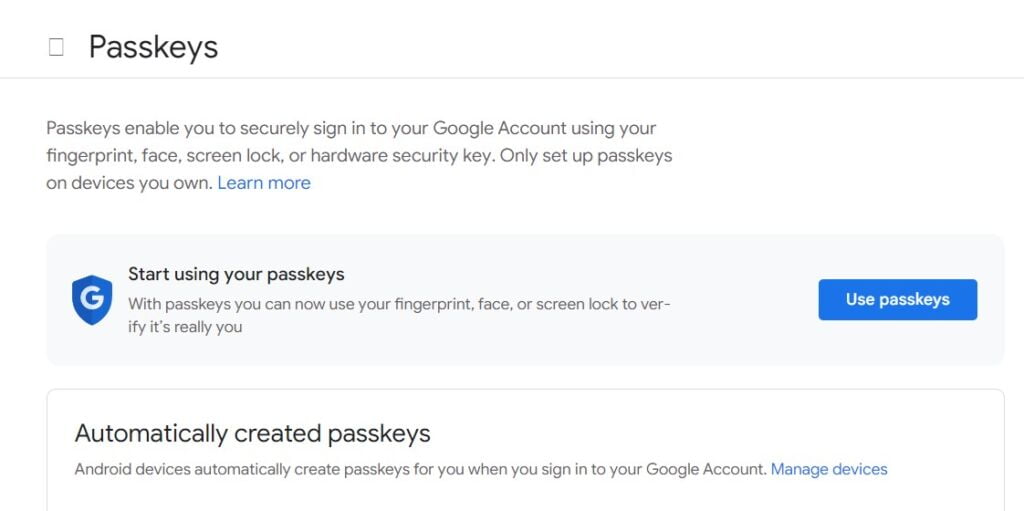
Passwords have always been a necessary evil and yes, the harder you had to come up with and remember an elaborate and complex key, the better for security. Until now, the main reinforcement of the password system is the two-factor authentication system, but Google has just implemented passkeys, security credentials associated with the PIN or biometric systems already used by the device in question. As the passkeys only exist on the devices and not in the cloud, the procedure is more secure. If you are not very clear about how you can activate and use Google passwords with your accounts, we will explain it to you step by step.
How to activate Google passwords: hardware and software requirements
Currently, you can create a passkey with any supported hardware on the list, including laptops and desktops running Windows 10 or macOS Ventura or later running Chrome 109, Safari 16, or Edge 109 or later. If you are going to configure the passkey with a tablet or mobile, it must have at least the iOS 16 or Android 9 operating systems. In any case, you can use it with any security device that supports the FIDO2 protocol.
It is also necessary to have the screen lock configured and if you want to use the phone to log in to another device, for example a laptop, you will have to have Bluetooth activated.
Finally, if you have an academic or professional Google Workspace account , you will not be able to configure Google passwords (but you can in personal accounts).
How to set a passkey for your Google account
If you want to activate the passkeys for your Google account now, then you will have to go to the web g.co/passkeys and log in. If you have an Android phone associated with your account, you may already have passkeys automatically enabled. If this is the case, you will see it listed in the ‘ Automatically created access keys ‘ section and the procedure will be as simple as tapping on the ‘ Use access keys ‘ button.

When you tap on the button, a pop-up window will appear to inform you that you can now use the passkey. What if no device appears on the list? That could happen to you if, for example, you have an iPhone. In this case, scroll to the bottom of the screen and click on ‘ Create access key ‘.
A recommendation : if you are doing this procedure from your computer, it is better to switch to your phone to activate the Google password configuration.
When you tap to create the access key, a pop-up will appear asking if you want to use the device you’re using (then tap ‘Continue’) or another. In the latter case, a QR code will appear for you to scan with your phone’s camera.
If you are also doing it from an iPhone, the possibility of saving your Google passkey in the iCloud Keychain will appear, confirm to continue with the biometric system that you have configured. And ready.

What happens if I lose, steal or change the device that has the Google passkey?
If for whatever reason you stop having access to the device on which you have configured the Google passkey, then it is possible to delete it. To do this you will have to enter your Google account and in ‘ Security ‘ that you will find in the left column, scroll down until you find ‘ How do you sign in to Google ‘ and access ‘ Access keys ‘. In ‘Automatically created access keys’, tap on ‘Manage devices’ and click on the X to delete it.
In case the passkey has been created automatically by Google, you will not be able to delete it: the only thing you can do is delete the account from the device by accessing your Google account again > ‘Security’ and there scroll to ‘Manage all devices’ and once inside, log out.
If after trying the Google passwords, you still prefer passwords and want to go back, you can do it from your Google account in the ‘Security’ section. There, scroll down to ‘Skip password when possible’ and slide the toggle to turn it off.
Also Read : How can you password protect Google search history

